A Practical Guide to Installing Your Water Purifier
Installing a water purifier doesn’t require professional expertise for most models. Follow this step-by-step guide to
ensure a seamless setup, whether you’re using an under-sink system or a countertop unit.
ensure a seamless setup, whether you’re using an under-sink system or a countertop unit.
Pre-Installation Preparations
- Gather Tools: Wrench, plumber’s tape, screwdriver, bucket, and pipe cutter (for under-sink models).
- Shut Off Water Supply: Turn off the cold water valve under the sink or at the main line. Open the faucet to drain residual water and relieve pressure.
- Read the Manual: Familiarize yourself with the unit’s components and specific instructions, as steps vary by model.

Under-Sink Purifier Installation
- Mount the Unit: Secure the main housing to the cabinet wall using the provided brackets and screws. Ensure it’s level and stable.
- Connect the Inlet Pipe:
- Attach a saddle valve to the cold water line using a wrench. Tighten with plumber’s tape to prevent leaks.
- Run the feed tube from the saddle valve to the purifier’s inlet port, ensuring a snug fit.
- Install Filters: Insert pre-assembled filter cartridges into their housings. Some models use quick-connect fittings; others require twisting until they click.
- Attach the Outlet Tube: Connect the purified water line to a dedicated faucet (included with most kits) or an adapter on the existing faucet.
- Flush the System: Turn on the water supply and let the purifier run for 10–15 minutes to flush out carbon dust and air bubbles. Discard the initial water.
- Check for Leaks: Inspect all connections with a paper towel. Tighten gently if needed, avoiding over-tightening that could crack fittings.
Countertop or Faucet-Mounted Models

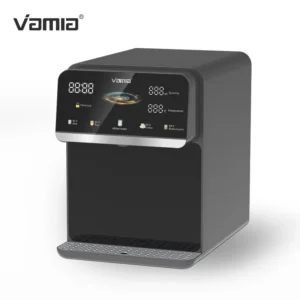
- Countertop Units: Place the purifier on a stable surface. Attach the inlet tube to the faucet using the provided adapter, ensuring a secure seal.
The outlet spout should align with a water container for easy dispensing. - Faucet-Mounted Units: Screw the purifier directly onto the faucet spout, switching between “purified” and “regular” modes via a toggle valve.
- No tools are required—simply hand-tighten the adapter.
Post-Installation Tips
- Label Filter Installation Dates: Use a marker to note the date on filter housings for easy replacement tracking.
- Test Water Quality: Use a TDS meter to compare pre- and post-purification readings. A significant drop (e.g., from 300 to 20 ppm) indicates effective filtration.
- Sanitize for Well Water: If using well water, run a food-grade disinfectant solution through the system as per the manual to eliminate potential bacterial residues.
Water Purifier Factory, Water Purifier For Home, Water Purifier Machine,Water Purifier, Water Filter Purifier System
For complex systems like whole-house RO or commercial units, consult a plumber to ensure proper integration with your home’s plumbing.
With careful planning and attention to detail, you’ll enjoy clean, filtered water in no time, enhancing both convenience and health.A Practical Guide to Installing Your Water Purifier
With careful planning and attention to detail, you’ll enjoy clean, filtered water in no time, enhancing both convenience and health.

